Sites.Selected Enabling API Permissions - For SharePoint Sites Crawl with PowerShell Script
Enabling API Permissions For the bot to Search/Crawl SharePoint Knowledge Articles
REGISTER APP IN AZURE AD To allow the bot to perform automation for your end-user, we need SharePoint site ID and to enable certain SharePoint Permission(s). We will guide you through how to do this in Azure AD. Please note that the SharePoint page being used should be open to all of the bot end-users. This is to avoid them not being able to open/access documents or any other material that may be returned by the bot. ENABLE SHAREPOINT API SharePoint API Permissions are Required for the bot to be able to search and provide knowledge articles from SharePoint.
- Sites.Selected
- User.Read.All TYPE OF PERMISSIONS REQUIRED
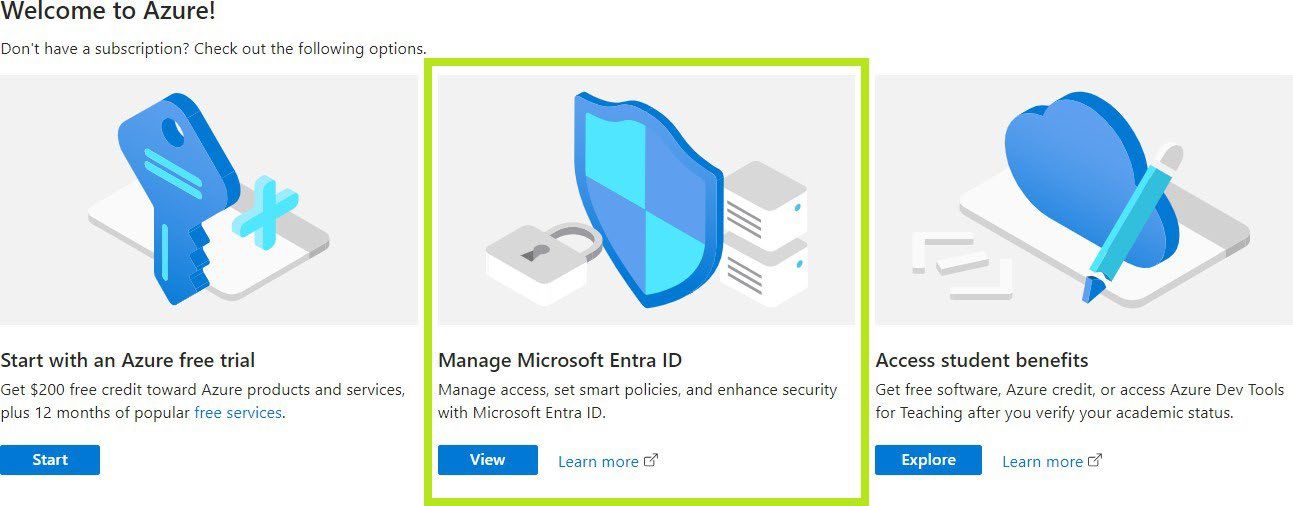
- Application permissions Instructions Part A Open your Azure Portal Click on the View button for Manage Microsoft Entra ID
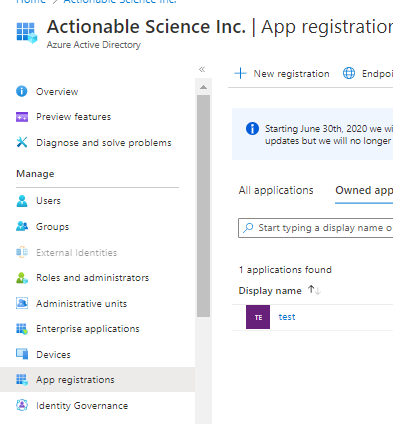
- Click on App Registration
- Search and Open the Rezolve SSO application you created
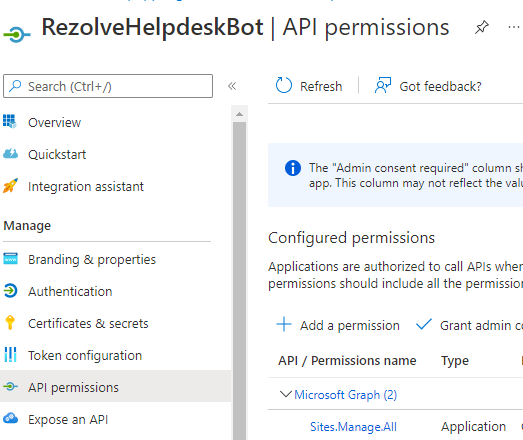
The App Overview page will open, look for API Permissions in the left hand side menu and click on it Select Add a Permission on the main part of the page 7. Scroll down and select SharePoint
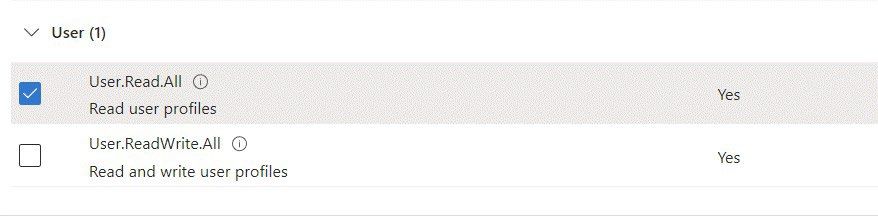
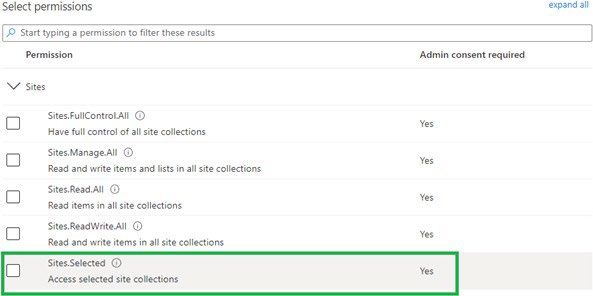
- Click on the Application Permission option Search sites in the, select Sites.selected and click Add Permissions Click Add a Permission > SharePoint > Application permissions again Type User in the search box, this time select User.Read.All and click Add Permissions
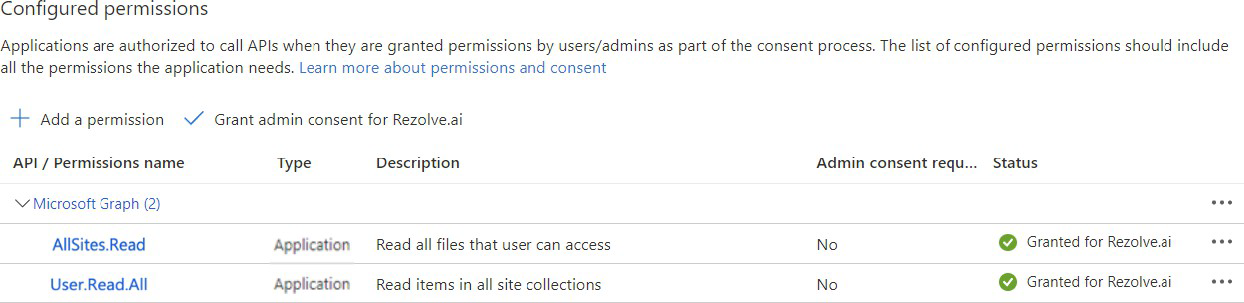
Close the Request API Permissions box so you are back at the Configure permissions screen Select Grant admin consent for … . 14. Click Yes to Grant admin consent confirmation 15. Confirm that the screen looks similar to below with your listed permissions, Admin Consent Req set to Yes and Granted for has a green check .
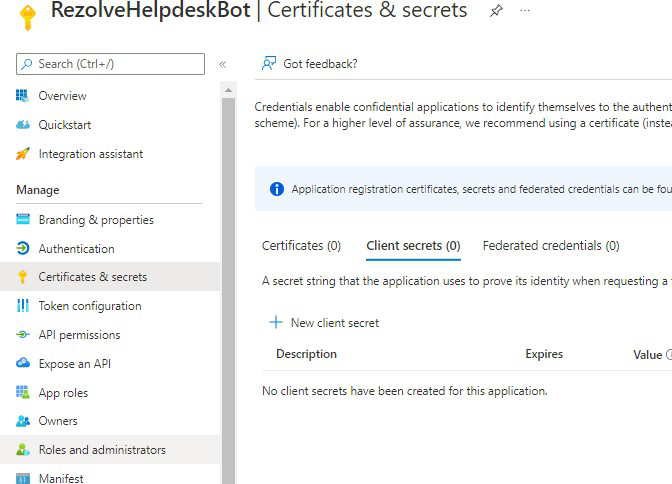
Instructions Part B Look for Certificates & secrets in the left hand side menu and select it Then select New client secret on the main part of the page
-
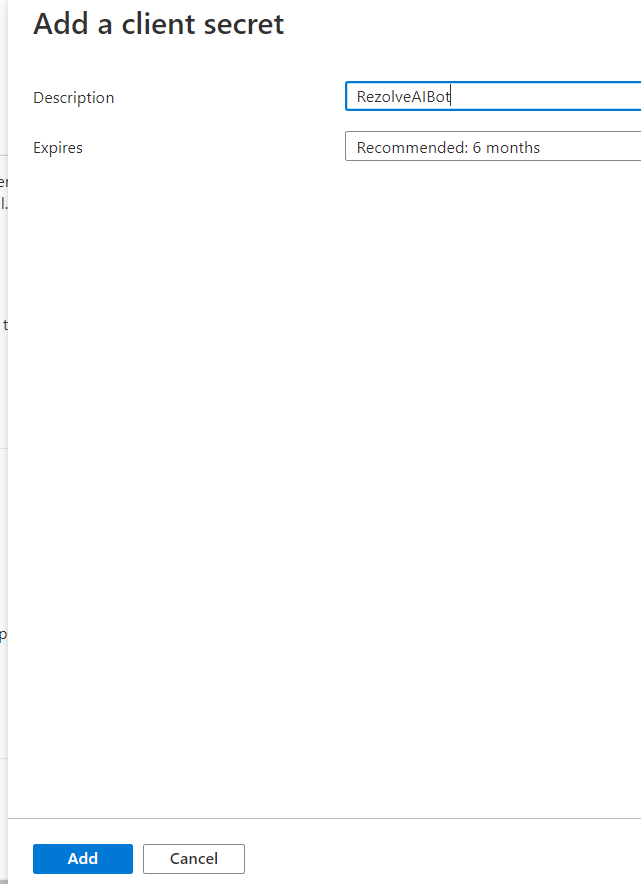
Enter a description i.e. RezolveAIBot and click Add .
-
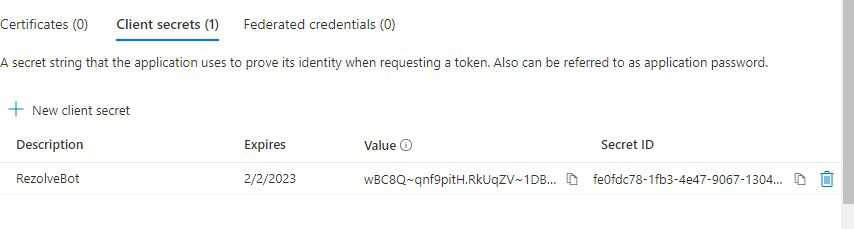
Copy the Value and Secret ID and save them somewhere
-
Select Overview in the left hand side menu
-
Copy the Application (client) ID and save with Client Secret ID
-
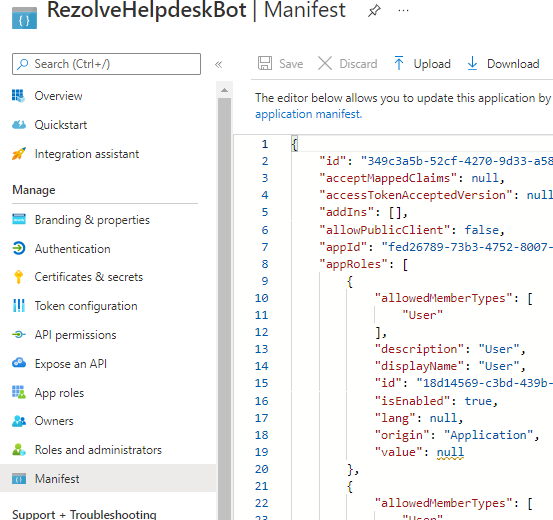
Select Manifest in the left hand side menu
-
Click on Download
-
Send the SharePoint Site ID, Application (client) ID, Client Secret ID, Client Secret Value and the downloaded Manifest to Rezolve
Instructions Part C Locating the site id and folder id in SharePoint is done by navigating to the SharePoint online site and then selecting the desired site or folder. The ID will be part of the URL of the page you are viewing. For example,‘https://your-tenant- name.sharepoint.com/sites/[Site-ID]’. To locate the Folder ID, navigate to the desired folder in the document library, the Folder ID will be the ID of the folder in the document library. The URL will look like 'https://your-tenantname.sharepoint.com/:f:/g/[Folder-ID]'. Remember that Azure registered app and SharePoint online may have different access and permission settings. Ensure that the app has the necessary permissions to access and manage the specific SharePoint site and its documents. Configuring sites.selected Permissions in SharePoint Online Instructions Part D Context This guide provides step-by-step instructions for configuring sites.selected permissions in SharePoint Online. The process involves registering an Azure AD application, connecting to SharePoint, granting necessary permissions, and troubleshooting common issues. Following this guide ensures secure and controlled access to specific SharePoint sites. Prerequisites Before proceeding, ensure you have: • An Azure AD application registered. • The required App ID and Client Secret. • Administrative access to the SharePoint tenant. • Installed PnP PowerShell module (Install-Module PnP.PowerShell). Step-by-Step Guide
- Define Variables Create a PowerShell script with the necessary variables:
Variables
$appId = "XXXXXXXX" # Replace with your App ID $displayName = "RezolveHelpdeskBot" # Replace with your App Display Name $permissions = "Read" # Use "Read" for read-only permissions, "Write" for read/write permissions
List of SharePoint site URLs
$siteUrls = @("https://companyname.sharepoint.com/sites/SiteName") # Replace with your SharePoint Site URL 2. Connect to SharePoint Tenant Ensure a successful connection to SharePoint Online:
Connect-PnPOnline -Url "https://companyname.sharepoint.com" -ClientId XXXXXXXXXXX -Interactive
- Grant Permission to Each Site Loop through each SharePoint site and grant the necessary permissions:
foreach ($siteUrl in $siteUrls) {
  Write-Host "Granting permission to $siteUrl"
  Grant-PnPAzureADAppSitePermission -AppId $appId -DisplayName $displayName -Site $siteUrl -Permissions $permissions
}
- Disconnect from SharePoint Once completed, disconnect from SharePoint:
Disconnect-PnPOnline
Script:
# Variables
$appId = "XXXXXXXX" # Replace with your App ID
$displayName = "RezolveHelpdeskBot" # Replace with your App Display Name
$permissions = "Read" # Use "Read" for read-only permissions, "Write" for read/write permissions
# List of SharePoint site URLs
$siteUrls = @(
"https://companyname.sharepoint.com/sites/ITKnowledge" # Replace with your SharePoint Site URL
)
# Connect to SharePoint tenant
Connect-PnPOnline -Url "https://companyname.sharepoint.com" -ClientId XXXXXXXXXXX -Interactive
# Grant permission to each site
foreach ($siteUrl in $siteUrls) {
  Write-Host "Granting permission to $siteUrl"
  Grant-PnPAzureADAppSitePermission -AppId $appId -DisplayName $displayName -Site $siteUrl -Permissions $permissions
}
# Disconnect from SharePoint
Disconnect-PnPOnline
This is an example of a successful screenshot: Troubleshooting Steps
- Issue with Grant-PnPAzureADAppSitePermission Error Message: There is currently no connection yet. Use Connect-PnPOnline to connect or provide a valid connection using - Connection. Possible Cause: • The Connect-PnPOnline command failed, and no valid session was established. Solution: • Ensure the Connect-PnPOnline step completes successfully before running Grant-PnPAzureADAppSitePermission. • Verify connectivity using: Get-PnPContext • If the connection fails, re-run Connect-PnPOnline with valid credentials.
- Disconnecting from PnPOnline Error Message: No connection to disconnect. Cause: • The connection was never established due to earlier issues. Solution: • Resolve the Connect-PnPOnline issue first before running Disconnect-PnPOnline. • Ensure a valid session exists using: Get-PnPContext Summary of Steps:
- Register an Azure AD application (if not already done).
- Update the Connect-PnPOnline command to use ClientId, ClientSecret, and Tenant.
- Ensure the connection is established before executing Grant-PnPAzureADAppSitePermission.
- Grant permissions to specific SharePoint sites.
- Disconnect from SharePoint once done. Following these steps will allow you to successfully enable sites.selected permissions in SharePoint Online.


![]()


![]()